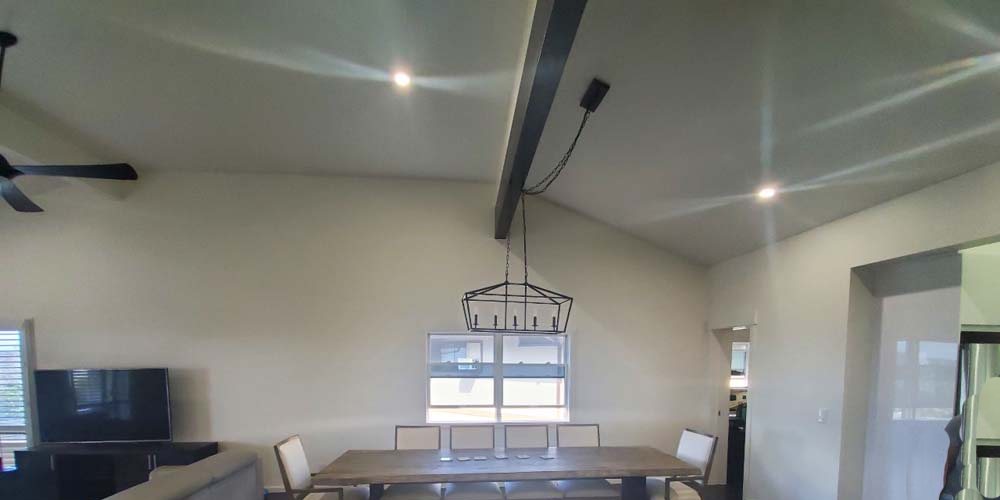
When it comes to a drywall project, most people only notice it when something goes wrong—cracks, seams, bulges, or bumpy textures that just don’t sit right. The reality is, even the best drywall installation can look bad if it’s not followed by top-notch taping and finishing. In fact, the taping and finishing stage is where a drywall job either shines or falls flat—literally and visually.
Whether you’re remodeling a home in O‘ahu or building out a brand-new commercial space, the quality of the finish defines the look, feel, and long-term performance of your walls. And that’s where expert craftsmanship makes all the difference.
The Hidden Importance of Drywall Project Finishing
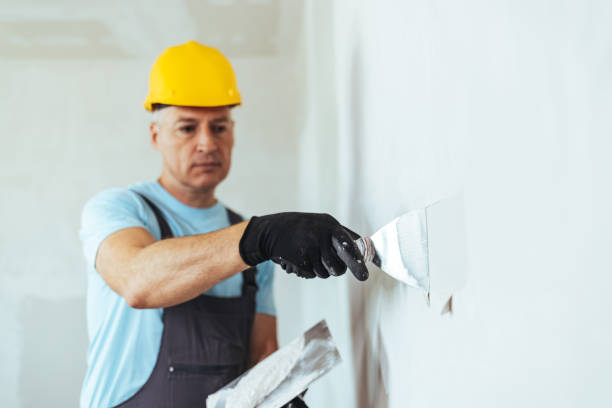
Drywall is a construction basic—every building has it. But it’s what happens after the sheets are hung that separates amateurs from pros. Taping and finishing are the critical steps that hide the seams, reinforce the structure, and prepare your walls for painting or texturing.
A perfectly smooth, flawless wall may look effortless, but it’s the result of multiple layers of joint compound, careful sanding, and attention to every detail—corners, butt joints, and inside angles alike. Skip or rush any of these steps, and the flaws will stick out like a sore thumb.
Here’s why proper taping and finishing are absolutely essential:
- Seamlessness: Creates the illusion of one continuous wall.
- Structural integrity: Strengthens joints and resists cracking.
- Paint readiness: Ensures a smooth, blemish-free surface for painting.
- Moisture resistance: Proper finish protects corners and joints from water damage.
- Longevity: Reduces the risk of future repairs and maintenance.
Why DIY or Low-Bid Work Often Fails
We’ve all seen it—or worse, lived with it: bubbling tape, cracking seams, or that wavy wall that just never looked quite right. Most often, this is the result of:
- Skipped steps (like not using mesh tape or applying too few coats)
- Rushing through drying and sanding
- Using cheap materials or incorrect tools
- Lack of skill or experience with corner beads and tricky transitions
When drywall finishing is done poorly, it doesn’t matter how nice your paint is, or how much you spent on décor—your space will always look “off.”
Meet the Drywall-Only Experts
Our team is exclusively focused on delivering top-tier drywall services, providing specialized expertise in drywall installation, finishing, and repair. Unlike general contractors that handle every aspect of construction, we concentrate solely on drywall—allowing us to perfect our craft and deliver impeccable results that truly transform your space.
From high-end custom homes to fast-paced commercial builds, we understand what quality looks like—and how to deliver it on time, every time.
McKeague Drywall elevates your environment with exceptional craftsmanship, precision installation, and superior repair solutions. We turn your walls into canvases of quality and durability, connecting you with professional services that matter most!
The 5 Levels of A Drywall Project Finish (and Why They Matter)
Not all drywall jobs require the same level of finishing. Depending on your space, lighting, and final wall treatment (paint, tile, texture), the level of finish should be tailored accordingly.
Here’s a fun breakdown:
🎨 Drywall Project Finish Levels: A Chart You Didn’t Know You Needed
| Level | Nickname | What It Means | Common Uses |
|---|---|---|---|
| Level 0 | “The Blank Slate” | No taping, no mud—just bare drywall. | Temporary walls or future construction. |
| Level 1 | “Rough Around the Edges” | Tape embedded in joint compound, no finishing. | Attics, garages, or service areas. |
| Level 2 | “Primer-Ready (Barely)” | One coat of compound over joints and screws. | Tile backer or utility rooms. |
| Level 3 | “Texture Starter” | Two coats over joints, smooth enough for texture. | Spray-textured walls and ceilings. |
| Level 4 | “The Gold Standard” | Three coats, sanded smooth—ideal for flat paint. | Most living spaces, offices, bedrooms. |
| Level 5 | “The Hollywood Finish” | The best of the best—Level 4 + skim coat for ultimate smoothness. | High-end spaces, glossy paints, bright light. |
How A McKeague Drywall Project Achieves Flawless Finishes
Our approach is simple: do the job right the first time. Whether it’s a small patch or an entire home build, our process focuses on precision, patience, and clean execution.
Here’s how we handle every project:
1. Joint Taping
We apply either paper tape or mesh (depending on the location) with a strong bonding compound, ensuring each seam is flat and secure.
2. First Coat Application
We embed the tape with compound and feather it out to start blending the seams.
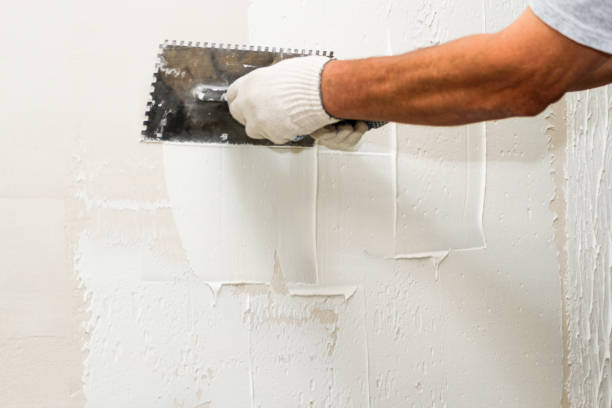
3. Multiple Finish Coats
We apply at least two more layers of mud, each wider and smoother than the last, allowing full drying time between coats to prevent shrinkage or cracking.
4. Detail Sanding
We sand thoroughly—but carefully—to eliminate ridges and create a silky smooth surface that’s paint-ready.
5. Skim Coating (if Level 5 needed)
For high-end finishes, we apply a thin, even skim coat across the entire surface and polish it to perfection.
6. Final Inspection
We conduct a detailed walkthrough with the client to ensure satisfaction before signing off on any job.
Real-World Examples of Quality (and Not-So-Quality) Drywall Project Finishing
We’ve been called in more times than we can count to fix bad finishing jobs. Some common red flags we correct:
- Tape bubbling or separating from the wall
- Poor corner bead application—causing sharp edges or gaps
- Obvious seams and flashing under paint
- Over-sanded areas that show through primer
- Visible screw dimples or “pock marks” in flat lighting
On the flip side, a well-finished drywall surface:
- Feels perfectly flat to the touch
- Looks uniform even under harsh lighting
- Paints evenly and holds up over time
- Enhances the look of everything else in the room
When It’s Worth Investing in Higher-Level Finishing
Sometimes clients ask if they really need Level 5. The answer depends on a few key factors:
- Will you use glossy or semi-gloss paint? These show every imperfection.
- Does the room get a lot of natural light? Windows can highlight surface issues.
- Is the space high-end or commercial? Quality walls match quality branding or design.
- Do you want it done once and done right? Then yes—it’s worth it.
Remember: It’s cheaper to do it right the first time than to redo it later.
Let’s Make Your Drywall Project Walls Shine
Taping and finishing are the unsung heroes of drywall. Done well, they’re invisible. Done poorly, they ruin the entire room. At McKeague Drywall, we believe great work shouldn’t just be seen—it should be felt. That’s why we take pride in every line, seam, and corner.
When you’re ready to upgrade your space with professional drywall finishing that sets the tone for everything that follows, we’re ready to help.
📞 Contact McKeague Drywall Today!
📧 Email: mckeagueg002@yahoo.com
📱 Phone: 808-392-6591
Whether you need flawless finishing for a single room or an entire property, we’re here to tape, mud, and sand your project into perfection.